Monday, February 27, 2012

Spiked Chocolate Mousse

This has been a very busy weekend, and this upcoming week already promises to be crazier then ever, but in a mostly good way. I like staying busy, but I'm also already looking forward to the weekend after next when I'll hopefully have a chance to relax. I'll be keeping my fingers crossed for that one.

Spiked Chocolate Mousse 2

But back to the point, last Friday was my friend's birthday and that, obviously, called for dessert. She's been trying to limit her carb intake, so instead of a cake I did some online sleuthing and landed on the world's best chocolate mousse recipe. With a few minor tweaks here and there (I never could leave well enough alone) I daresay it came out even better then I could have hoped for.

Spiked Chocolate Mousse 3

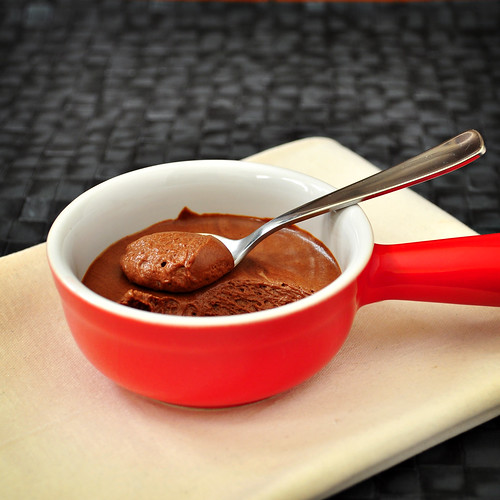
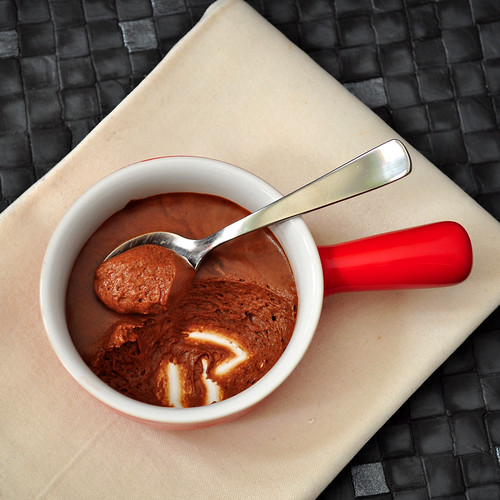
Mousse is not hard to assemble, but with the best possible ingredients and a tiny bit of patience you will be rewarded with a deep, rich, immensely flavorful vessel of amazingness to share with those you love. I'd throw out a bunch more adjectives at you, but I'd rather not waste more of your time and get you straight to the recipe so you can make this right now and see what I'm talking about.
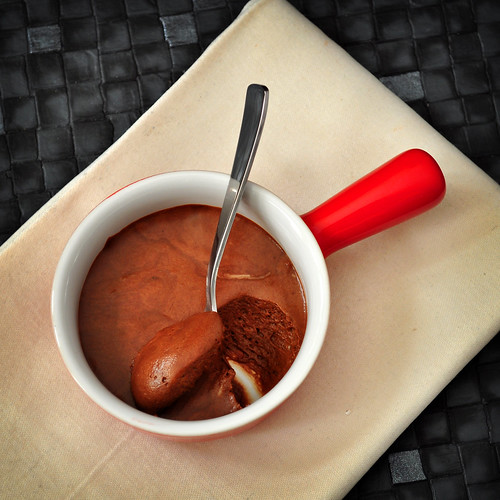
Spiked Chocolate Mousse

Chocolate Mousse
Adapted slightly from Cooks Illustrated’s The New Best Recipe, via Crumbly Cookie
6 ounces bittersweet or semisweet chocolate, chopped coarse
4 tablespoons (½ stick) unsalted butter
Pinch salt
1 teaspoon vanilla extract
1 Tbsp espresso powder
3 Tbsp Irish Cream
4 large eggs, separated2 tablespoons light brown sugar
½ cup chilled heavy cream, plus more for serving
1. Melt the chocolate in a medium bowl set over a large saucepan of barely simmering water or in an uncovered Pyrex measuring cup microwaved at 50 percent power for 3 minutes, stirring once at the 2-minute mark. Whisk the butter into the melted chocolate, 1 tablespoon at a time. Stir in the salt, vanilla, espresso and Irish Cream until completely incorporated. Whisk in the yolks, one at a time, making sure that each is fully incorporated before adding the next; set the mixture aside.
2. Whisk the egg whites in a clean mixing bowl set over a saucepan of hot water until slightly warm, 1 to 2 minutes; remove the bowl from the saucepan. Beat with an electric mixer set at medium speed until soft peaks form. Raise the mixer speed to high and slowly add the sugar; beat to soft peaks. Fold a quarter of the beaten whites into the chocolate mixture to lighten it, then gently fold in the remaining whites.
3. Whip the cream to soft peaks. Gently fold the whipped cream into the mousse. Spoon portions of the mousse into 8 individual serving dishes or goblets. You can possibly even get more servings out of the batch, It's very rich so a little will go a long way. Cover tightly with Saran wrap and refrigerate to allow the flavors to blend, at least 2 hours and up to 24.  Serve with additional whipped cream or with some fresh berries on top.

Wednesday, February 22, 2012

Curried Carrot Soup with Ginger

It's Restaurant Week here in Chicago, but with all the beginning of the year expenses even the discounted menus are entirely out of my budget. Why does it seem like all the big bills come right after you're done paying for the holidays? My friend spend more then two days pouring over all the menus and throwing out ideas, but I went home opened the fridge and made soup.

Curried Carrot and Ginger Soup

I can't tell you how or why, but these days it seems I have an endless supply of carrots in the fridge. I don't remember buying them and yet each time I open the fridge door there are more and more packages of them. In an effort to stay frugal and eat healthy, I decided to try a carrot soup. I had seen a recipe similar to what I was looking for in the last Food & Wine magazine, but it called for 3/4 cup of oil and there was no way I could justify that, so I used their recipe as a base and tweaked here and there to make it work for me. I nixed the tarragon oil since I don't care for tarragon anyways, pumped up the garlic, replaced water with chicken stock for flavor and added a tiny bit of yogurt on top to tame down the spice. I've now been eating this soup for a week and I still love how it came out. It may not be Sunda, but this girl is happy.

Curried Carrot and Ginger Soup 2


Curried Carrot Soup with Ginger
Adapted from Food & Wine

- 2 Tbsp extra-virgin olive oil
- 1 large white onion, coarsely chopped
- 4 garlic cloves, smashed and sliced
- 1 tablespoon minced peeled ginger
- 2 teaspoons curry powder
- 1 1/2 pounds carrots, thinly sliced
- 7 cups low fat chicken stock*
- 1 teaspoon sugar
- salt
- freshly ground pepper
- flat-leaf parsley leaves, for garnish
- plain yogurt, for garnish

1. In a large pot, heat 2 Tbsp of oil, add the onion and cook over moderately high heat, stirring frequently until softened, about 6 minutes. Add the garlic, ginger and curry powder and cook, stirring, until fragrant, about 2 minutes. Add the carrots and cook, stirring, for 4 minutes longer. Add the water and sugar and season with salt and pepper. Simmer over moderately low heat until the carrots are very tender, about 45 minutes.
2. Carefully puree the hot soup in a blender or my favorite kitchen tool ever: the immersion blender, adjust salt and pepper to taste and serve, garnished with parsley and a drizzle of yogurt.

* You can also do half stock half water, but I made it once with just water and it was just too bland.

Monday, February 13, 2012

Red Velvet Cheesecake Brownies

Tomorrow is Valentine's day, are you ready? Do you have all your valentines signed and sealed, with the little chocolates taped to each one? Do you have your reservations made and that perfect outfit picked out? Have you planned out dessert?

Red Velvet Cheesecake Brownies

My valentine tomorrow will be my sister, who I'm meeting up with after work for dinner at Girl and Goat. Yum! And while I'm no longer in grade school and little paper valentines are no longer a requirement, I've decided to bring some treats to share at work.

Red Velvet Cheesecake Brownie 2

This is the third time in just few weeks that I've made these. Once for my sister's surprise birthday party, once for a potluck party at my friend's house, and now again for V-day. They're so pretty, amazingly delicious, come together pretty quickly. Plus, I'm not sick of them yet. Swirling the topping is my favorite part and so far everyone I'd shared them with loved them. Grab a bowl and whip some up for your valentine(s) :D

Red Velvet Cheesecake Brownies 2

Red Velvet Cheesecake Brownies
Recipe adapted slightly from The Novice Chef

Red Velvet Layer:
3 1/4 cups flour
2 1/4 cups granulated sugar
5 Tbsp cocoa powder
1 tsp salt
1/2 tsp baking powder
3 eggs
1 cup vegetable oil
8 Tbsp milk, divided
1 Tbsp vanilla extract
1 Tbsp red food coloring
2 tsp white vinegar

Cheesecake Layer:
2 8oz packages cream cheese, softened
3/4 cup granulated sugar
2 eggs
2 tsp vanilla

- Preheat oven to 350F degrees. Grease a 13 x 18 jelly roll pan with a little melted butter or spray with cooking spray.
- In large bowl, whisk together flour, sugar, cocoa powder (sift it right into the bowl to get rid of any lumps), salt, and baking powder. Make a little well in the middle and pour in the eggs, vegetable oil, 4 Tbsp milk, vanilla extract, red food coloring, and white vinegar. Carefully whisk the liquids in the middle and then incorporate the surrounding dry ingredients until you get an even mixture, which will be quite thick.
- Pour the batter into the pan, reserving about 3/4 cup of it in the bowl. Smooth the batter in the pan using a spatula or the back of a spoon, making sure it's even and and reaches all the edges.
- Add the remaining 4 tablespoons of milk to your reserved batter (and maybe an extra squirt of red food coloring if you want the color deeper) and whisk to form a looser batter. Set aside.
- In a mixer, beat the cream cheese and sugar until fluffy, about 2 minutes. Add eggs and vanilla, beating until combined and there are no lumps. Remember to stop, clean the beaters and beat again about halfway through. Pour the cream cheese mixture on top of the red velvet layer and smooth mixture till it reaches all the edges.
- Drop spoonfuls of the remaining red velvet batter onto the top of the cheesecake layer. Drag the tip of a knife or a toothpick through just the top cheesecake layer to create swirls.
- Bake for 25-30 minutes, rotating half way through, or just until the center is set and it no longer jiggles. You'll have just a tiny bit of color around the edges, but don't let it get too dark...unless you like crispy brownie edges, in which case rock on.
- Let cool completely on a wire rack before cutting. Either cut into squares as usual, or use cookie cutters for extra cuteness.